Blank LabelsCustom Labels
Home Articles Sticker Paper Cut Settings Guide for Silhouette, Cricut, and More

Sticker Paper Cut Settings Guide for Silhouette, Cricut, and More

Updated 12/10/2025

Using an electronic paper cutter like the Silhouette Cameo®, Cricut Explore®, or Brother ScanNCut®, is the easiest and most efficient way to create custom stickers. These versatile cutters coupled with high-quality sticker paper can help you create beautiful stickers of all kinds, and even custom product labels (Check out these ideas for other cutting machine projects)!

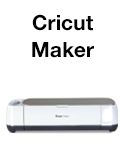
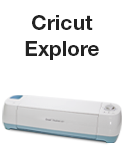
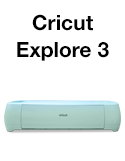
Below you'll find a handy recommended settings guide for most of the popular cutting machine brands and products on the market. We tested all of our materials personally, to save you from wasting time and money trying to figure it out yourself! Just find your machine and click on it to be taken to a table specific to your machine that contains the proper cut settings for each material we offer.

Included in the tables are various settings to produce kiss-cut and full-cut stickers. They vary for each paper electronic cutter and material, so you bookmark the page for future reference! You can also click the orange button under the table to download a printable cut settings PDF for your machine.

Note: These settings are for OnlineLabels.com materials only. Cut settings may vary depending on the wear of your blade. If this is the case, continue to slightly increase or decrease pressure settings depending on your desired outcome.


If you love your Silhouette Cameo®, Cricut Explore®, or Brother ScanNCut®, we want to help you maximize its use and get professional-looking end results! We hope this cut settings guide helps you create the stickers of your dreams.

Don't forget to look over our custom sticker tutorial and list of best sticker paper materials.

OnlineLabels.com is not affiliated with Silhouette®, Cricut®, or Brother® brands. All copyrights belong to their respective owners.

Frequently Asked Questions

1. Do the recommended settings apply universally to all sticker papers and cutters?

No, the settings depend on your cutting machine model and the material you are cutting.

2. What should I do if my machine doesn’t produce a clean cut even after using these settings?

Start by increasing or decreasing the pressure incrementally. If that doesn’t help, check your blade for wear and try a new one.

3. How can I save or print the recommended settings for future use?

Click the orange Download PDF button found under each machine section in the article. You can print or save this file for quick reference next time you cut.

4. How can I prevent my stickers from peeling or curling after I cut them?

Keep your cutting mat clean and sticky. Use the correct kiss-cut pressure to prevent the backing from being sliced. Store your sticker sheets flat in a cool, dry place to avoid peeling or curling.

Frequently Asked Questions

1. Now that I have the correct cut settings for my machine, what should I do first?

Print a short test batch (one or two sheets or a handful of stickers) using the exact sticker paper and material you intend to use. Verify that the cuts (kiss cuts or die cuts) are clean, the blade does not cut through the backing, and the detail and registration are accurate.

2. What should I check when selecting the sticker paper material for my project?

Ensure the material’s finish suits the end use and whether it’ll be exposed to moisture. Use the corresponding cut-settings chart in the article to match your machine and blade type.

3. How do I adapt these settings for a different machine or blade variant?

Locate the chart in the article that matches your specific machine model and blade type, and follow the prescribed settings. If your machine isn’t listed, use the settings of the nearest model as a starting point and test.

4. My cuts came out too deep (cutting through the backing) or too shallow (not cutting through the sticker). How can I fix these errors?

When your stickers are cut too deeply, reduce the blade pressure or the number of passes, and check the blade's sharpness. For when the cut is too shallow, increase the pressure or replace the blade.

5. Once I’ve got clean cuts, what are the best practices for producing a full run?

Ensure that your cutter is well-maintained and reload the material carefully to ensure the alignment is secure and remains consistent. Monitor the early sheets for alignment and make adjustments before processing the entire batch.

6. If I change the sticker size or shape (e.g., from a square label to a die-cut shape), do the settings need to be adjusted accordingly?

Possibly, the material remains the same, but more complex shapes or minor cuts may require finer adjustments (especially if intricate details are needed). Always run a small test when changing size/shape, even if the material remains the same.

Frequently Asked Questions

1. How do I start using these free shipping label templates?

Download the template for your label size, customize it with your desired information, run a quick test print, and then begin printing.

2. What if the template doesn’t align with my label sheets?

Double-check that you are using the correct label template. If so, ensure your print settings are set to "Actual Size" or "100%."

3. Can I add barcodes or other data?

Yes, you can insert barcodes or use mail-merge to auto-populate tracking numbers or customer data.

4. What type of printer should I use for professional results?

A thermal label printer is ideal for high-volume shipping printing.


Share What You Learned