Label Printing Alignment Guide
If your labels are printing out of alignment, we're here to help. While no two printers are the same, this guide addresses common label printing problems and their solutions to help you get a great print every time.
If you know your printing issue, select it from the following list. If you're unsure of your problem, scroll through the graphics below to find the example that best matches your issue.
Issue 1: Page Scaling
What to look for
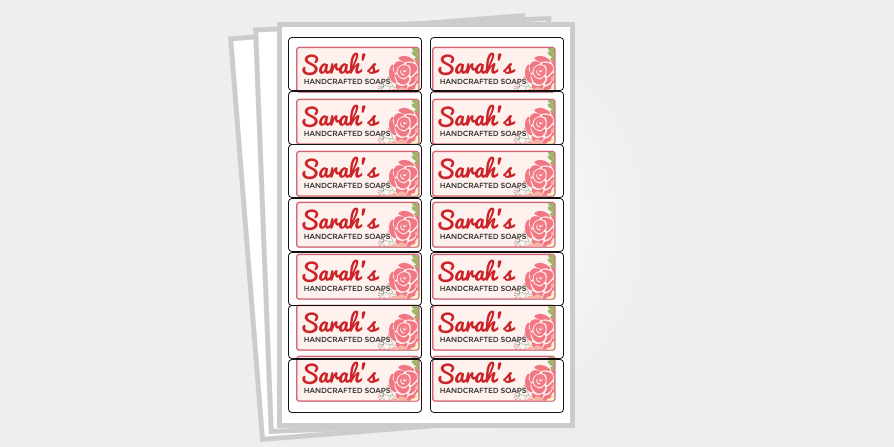
The labels near the center of your sheet may be very close to correct, but as you move out from the center, your label designs start to misalign.
The labels in the top-left corner will tend to be misaligned down and to the right whereas the labels in the bottom-right corner will tend to be misaligned up and to the left.
Why it happens
When it comes time to print, your browser or PDF viewer is shrinking the document in order to fit within your printer's margins.
Solution: Check your print settings
Open the print dialog box in your preferred program. Look for an option that allows you to print at actual size or at 100% scale. Most PDF viewers will give you this option, but some browsers may not. If it isn't an available choice, please download Adobe Acrobat Reader DC and use that to continue printing.
Issue 2: Uniform Misalignment
What to look for
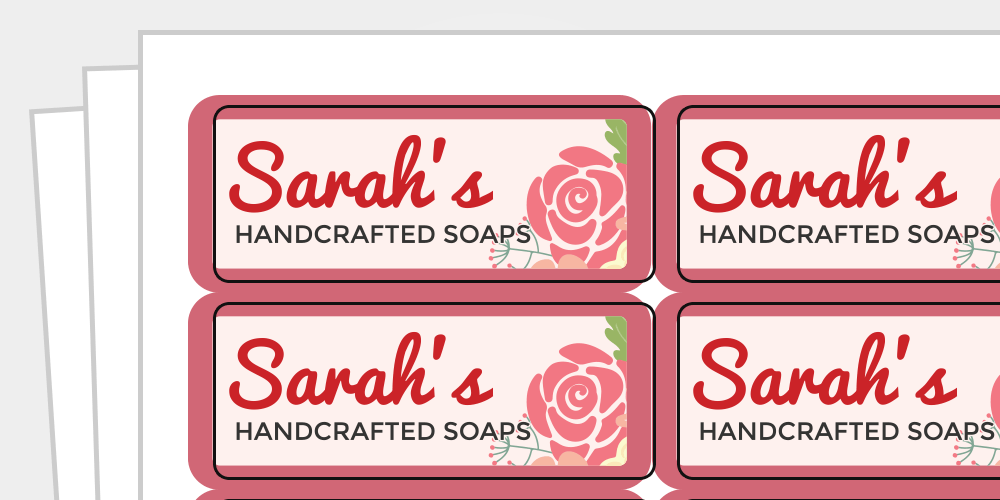
Your labels are consistently off in the same way. The degree of misalignment is uniform from row-to-row or column-to-column.
Why it happens
Several factors affect how your label sheets are pulled through the printer. This can impact where your printer begins printing and cause your starting point to be too high/low or left/right.
Solution: Adjust your page margins
When your printer is the cause of misalignment, the easiest way to line up your template and fix off-center prints is to adjust the settings in "Page Setup." Below are instructions for doing so in Maestro Label Designer and Microsoft Word.
Maestro Label Designer
Hover over "File" and then "Print" in the blue navigation bar to access the Alignment Wizard. Click "Create Alignment Page," load a blank label sheet into your printer, and print the document that opens.
Once you've printed the test page, return to Maestro Label Designer and complete a short series of questions on-screen. The wizard will automatically apply your adjustments to your design and direct you back to the design page. Try printing your labels again.
You can also manually adjust your margins by clicking on "Page Setup" in the same "File," "Print" menu. Read the steps below under Microsoft Word for additional instructions.
Microsoft Word
Grab a ruler and determine how far your design is off in each direction on your printed sheet. Once you have your measurements, open the "Page Setup" menu. To adjust your margins manually, follow these instructions:
- If design is too far left, add your measurement to "Left"
- If design is too far right, subtract your measurement from "Left"
- If design is too high, add your measurement to "Top"
- If design is too low, subtract your measurement from "Top"
Once you've made the necessary changes, close the "Page Setup" menu and try printing your labels again.
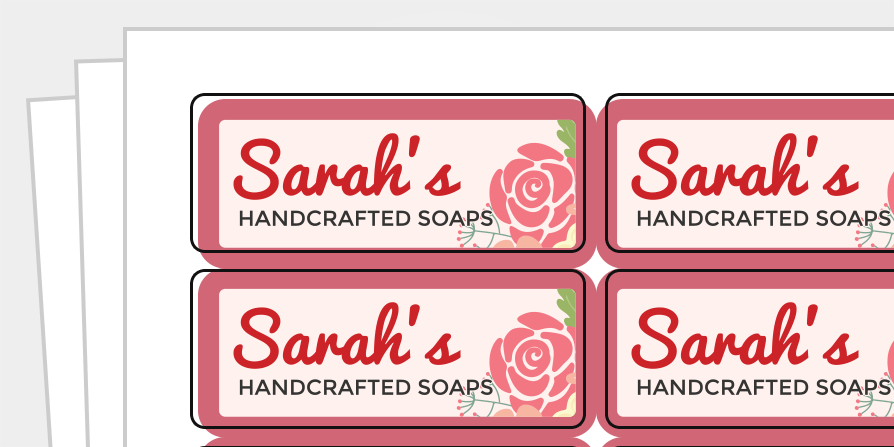
Issue 3: Design Isn't Optimized
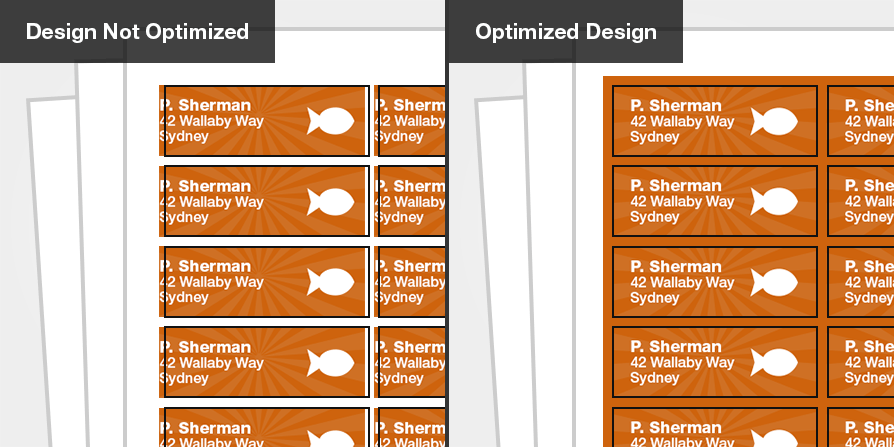
What to look for
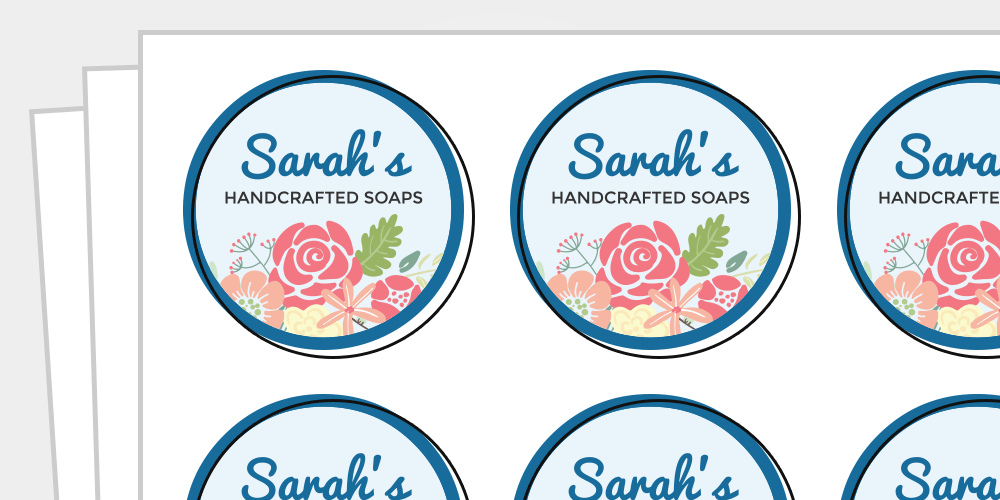
Your sheets shifted ever-so-slightly during printing and your design didn't allow for any wiggle room.
Why it happens
The label sheets move as they feed through the printer. If your design doesn't allow for some movement, slight shifts can be very apparent.
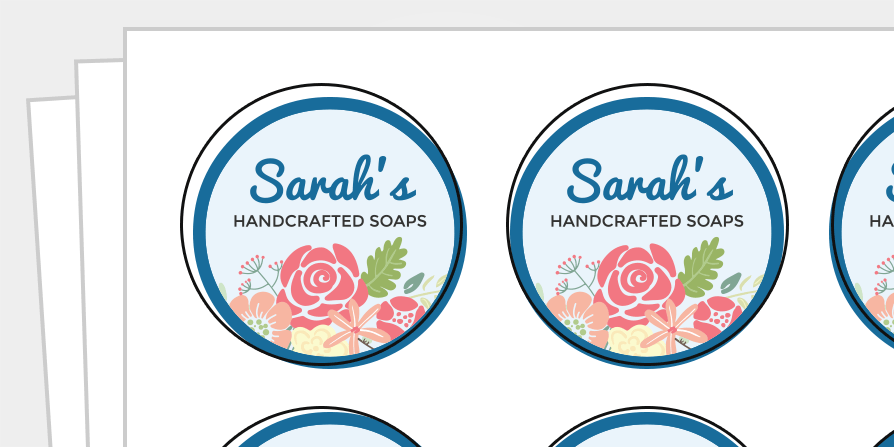
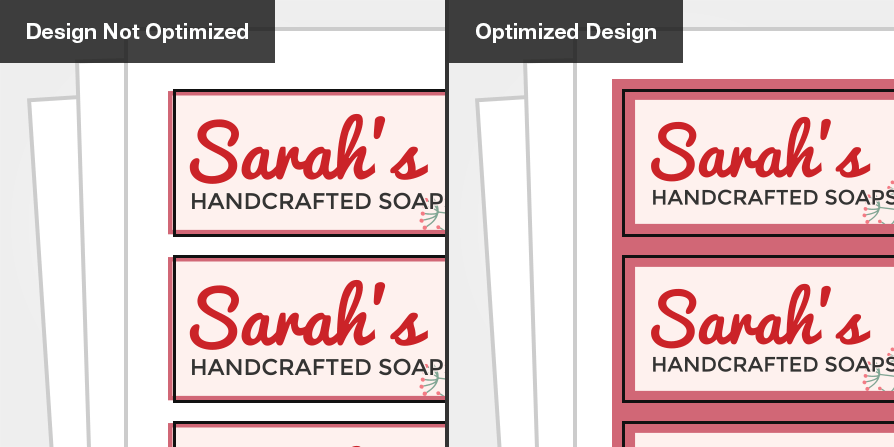
Solution 1: Add bleed
When you allow your design to continue past the label outline, you're adding bleed. The term "bleed" refers to the portion of your design that exists outside the label boundary. It's there to ensure that once your label is peeled up from the liner, your design reaches the edge.
Without bleed, you might have unprinted edges when your sheets shift. We recommend adding 1/8" (0.125") of bleed to your design when possible. Below are instructions for doing so in Maestro Label Designer and Microsoft Word.
Maestro Label Designer
If you're using the "Background Color" tool, we automatically extend your color of choice to the bleed-line during printing. If you want a border on your label, follow this guide for doing so with bleed. If you're using a photo or image as your background, turn on the "Bleed Zone" guide and enlarge your artwork so it touches the outermost gray line.
Microsoft Word
If you added a background color using "Shapes," make sure it's larger than the label itself. We recommend putting it across the entire sheet if your design permits. If you're adding a border or using a photo as your background, the same rules apply – ensure it sits comfortably inside and outside the label outline.
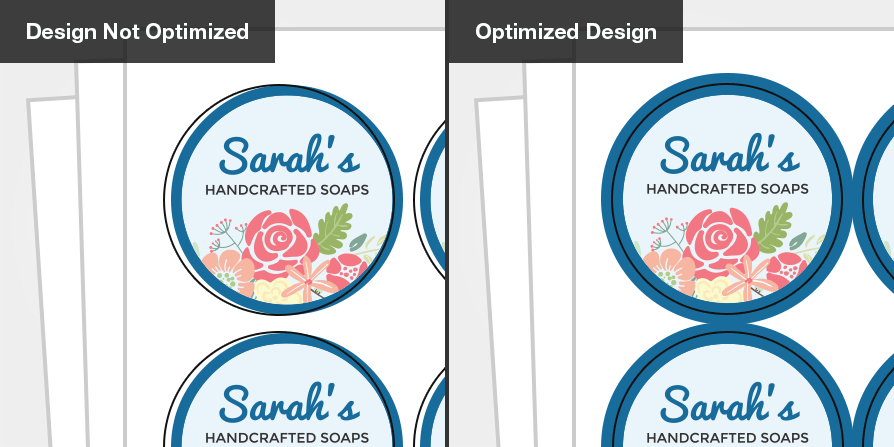
Solution 2: Observe the Safe Zone
You want there to be extra buffer inside your label as well. Moving text and design elements away from the edges will help them avoid getting cut off.
We recommend adding 1/8" (0.125") of a "safe zone" between the label outline and your text/design elements. Below are instructions for doing so in Maestro Label Designer and Microsoft Word.
Maestro Label Designer
Turn on the "Safe Zone" guide and move all text/design elements within the innermost gray boundary.
Microsoft Word
Turn on gridlines for a visual safe zone guide. Click the "View" tab then check the "Gridlines" box to enable them. Each box is 1/8" (our recommended safe zone size), so keeping text and design elements out of those spaces should do it.
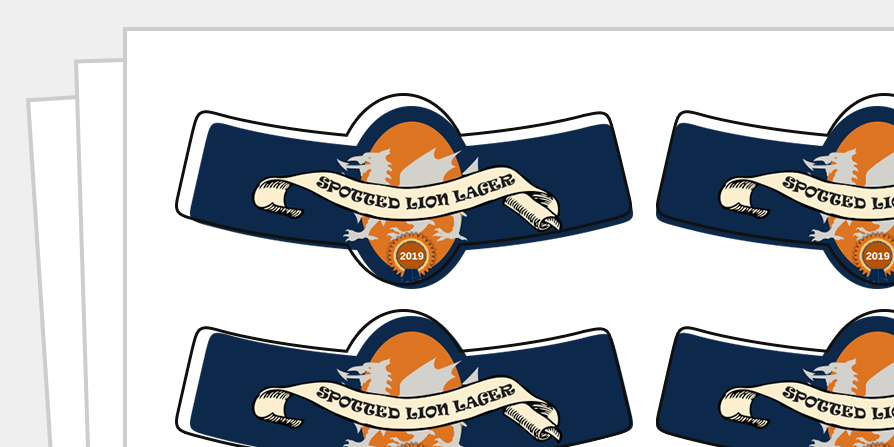
Issue 4: Non-Printable Margins
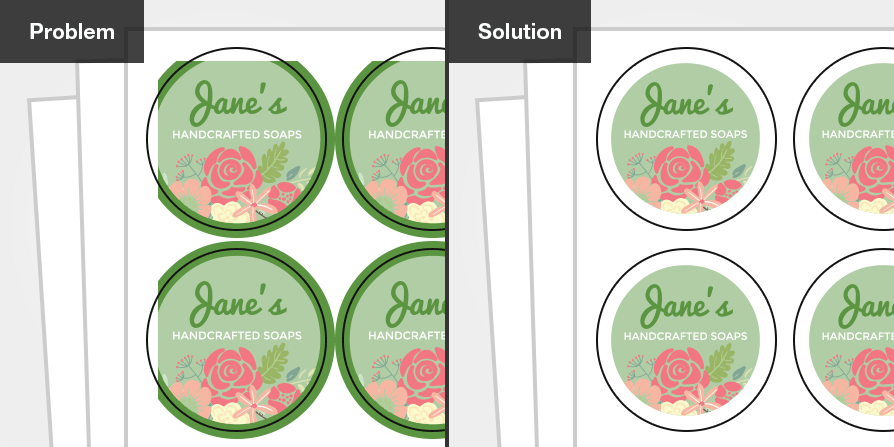
What to look for
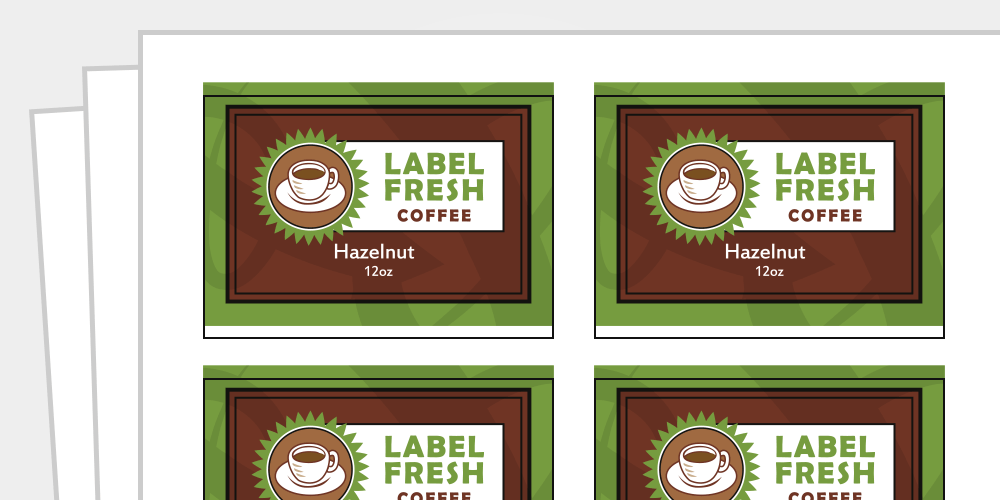
Your design is getting cut off on labels close to the edge of your sheet.
Why it happens
Standard desktop printers can't print all the way to the edge of a sheet. They have a perimeter around the sheet called the "non-printable margin" where the printhead can't reach. It varies by manufacturer and model, but the limit for most printers is 0.25".
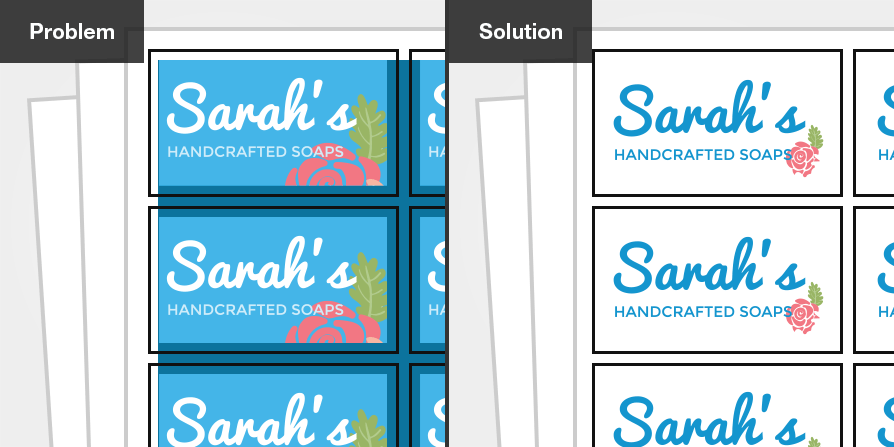
Solution: Incorporate a blank border throughout your design
You'll want to modify your design to adjust for any non-printable areas. Test your printer's non-printable margins before getting started.
Once you know the specific perimeter for your printer, consider how to adjust your design. While you have non-printable margins on all four sides of your label sheet, it may only affect one side of each label.
We recommend removing any background colors or full-color designs, or adding a blank border around each label. This will help prevent any unprinted sections from looking out of place.
If you still need help aligning your labels, our customer service team is at your disposal. Call us at 1-888-575-2235 for one-on-one troubleshooting. You can also take our alignment questionnaire or visit our related articles on the topic, including Troubleshooting Label Printing.
