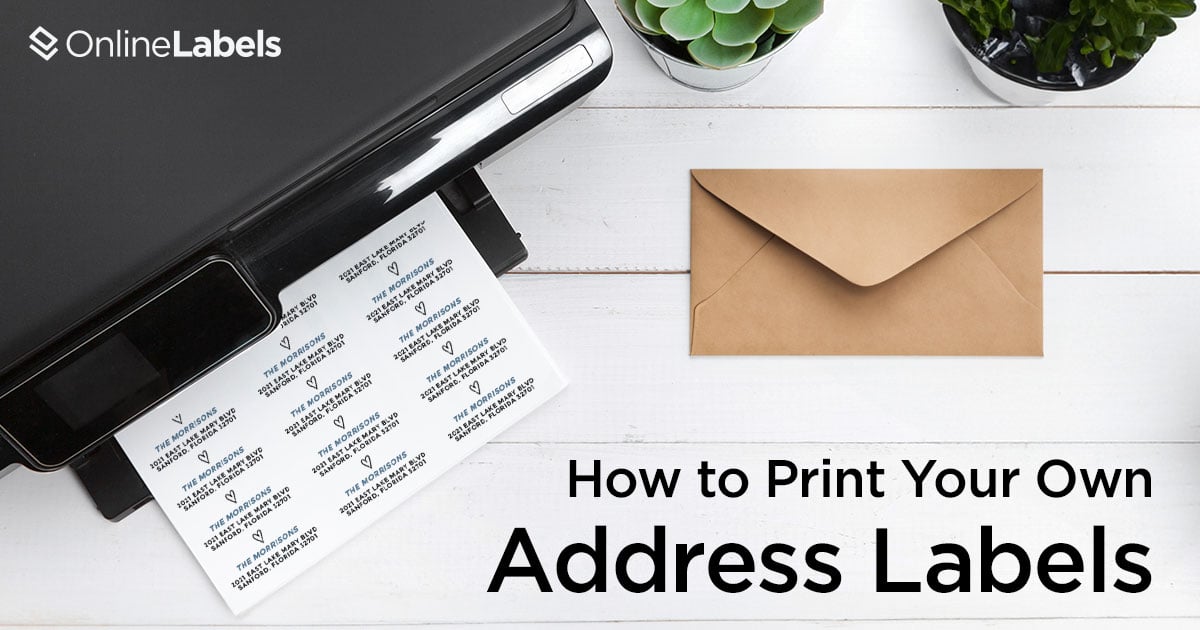
How to Print Your Own Address Labels

Postal history is fascinating to say the least. According to history.com, "The U.S. postal system was established by the Second Continental Congress, with Benjamin Franklin as its first postmaster general in 1775, making it one of the oldest institutions of the United States!"
And while a lot has changed over the last few centuries, the need for letters to have the recipient’s address noted has remained essential. Today, these noted addresses not only ensure your mail reaches its desired destination but also allow you to add different elements to the envelopes and packages to make them more personalized and fun.
Whether you’re sending out wedding invitations or packages for your business, printing your own address labels is convenient, cost effective and an easy way to add a creative touch.
In this step-by-step guide, we’ll walk you through everything you need to know to begin printing your own address labels so you can streamline your current process.
Benefits of Printing Your Own Address Labels
Customization and Branding
Printing your own address labels allows you to be as creative as you want. You can use any fonts, colors, text sizes and logos that you desire, allowing you to reinforce branding (if you’re sending something business related) and stick out from the crowd.
Flexibility
Because you have complete control of your address labels, you have the flexibility to change them at any time. Holidays right around the corner? Change the colors or add a wreath around your logo to bring the spirit to life. Wedding invitations? Bring in elements that align with your theme as this is one of the first ways to showcase what guests can expect at your wedding.
Cost Savings
Every cost counts when it comes to shipping! While there can be some extra costs upfront (if you don’t own a printer or your desired ink), it will prove to be cheaper than outsourcing because you can buy your label sheets in bulk. Plus - you’ll no longer have to pay for shipping if you’re ordering from a big printing service that isn’t local, or driving somewhere to print as you need them.
Time Efficiency
Whether you’re currently handwriting your address labels or outsourcing, you’re not making the most of your time. Both of these options don’t allow you to multitask while the printer is doing the work. You can save even more time by utilizing an existing template or creating your own. Printing your own labels also provides a quick solution (at any time of the day) if you need to send something out on short notice.
Gathering Supplies
Now that you know the benefits, let’s make sure you have all (there’s only three!) of the essential supplies needed for printing your own address labels.
This may go without saying but you’ll need a computer to print your own address labels. While it’s possible to do it from your phone, a computer will make the process a lot more efficient.
Contrary to popular belief, you don’t need a fancy printer to print address labels. Whether you need a standard inkjet, a laser or thermal label printer depends on the results you’re looking to achieve and the money you’re willing to invest. They each have their pros and cons, so spend a little time researching before you commit to one.
The last piece of the printing supply puzzle is of course, the labels. Before you place a bulk order, let’s explore our options.
Best Sizes for Address Labels
There’s no shortage of options when it’s coming to labels. To help with your selection, start by taking inventory of what it is you plan to send and how you’d like your address label to look on it. Then, download our free printable label tools and open them in Adobe Acrobat Reader, print them on standard printer paper and grab your scissors. The next few steps are straightforward: cut out your ruler, confirm your ruler increments are accurate, measure your item and choose your label size.
If you’d rather just jump straight into making your own personalized address labels, we recommend utilizing our most common label sizes: OL875, OL25, OL125.
Best Materials for Address Labels
Just as there are a ton of label sizes, there are also a number of different materials for address labels. The material we recommend for your address labels will depend on your goals.
- Standard White Matte or Recycled White Matte: This is our most popular and versatile material. It’s a bright white face sheet with a sticky, permanent adhesive. Best results are achieved when printed with a standard laser or inkjet printer.
- Aggressive White Matte: If you’re working with a textured or corrugated box, or sending during the summer months with extremely hot temperatures, you might opt for aggressive white matte as it’s a more powerful and durable version of the standard white matte.
- Weatherproof Matte Inkjet, Weatherproof Gloss Inkjet, Weatherproof Polyester Laser: These options are extremely durable as they are designed to withstand moisture or water while still remaining intact and scannable.
- Blockout for Laser: This one speaks for itself - if you need to cover up outdated information from an old label or any unwanted markings on packages, this option is best for you.
- Pastel, True Color, and Brown Kraft: If you really want your label to stand out and align with your brand, these options might be best for you.
Roll vs. Sheets
After you’ve determined what size and material you’d like to move forward with for your address labels, it’s time to determine which type is best suited for your printing needs. The good news is you only have two options to choose from: sheet labels and roll labels. They cater to different needs and function vastly differently.
Sheet labels are most common for small batch projects or personal use as they don’t require a special kind of printer. They’re intended for use with inkjet and laser printers and come in the standard 8.5" x 11" paper size, as well as in large format configurations: 8.5" x 14", 11" x 17", and 12" x 18". Although it sounds too easy to be true, all you have to do is load them into your printer as you would traditional printer paper and you’re good to go!
Roll labels can only be used on dedicated label printers (direct thermal, thermal transfer or inkjet roll prints). They are printed individually which makes them a great option for address labels as each one will be different.
Using Address Label Templates
Blank
Have a specific look in mind for your address labels? First, have fun creating and uploading it to your favorite design platform. After, choose from many of our rectangular, square, round, CD/DVD and unique label templates for all standard 8.5" x 11" sheet sizes and voilà - you have perfectly aligned prints!
Pre-Designed
If you’re not exactly sure of how you want your address labels to look, browse pre-designed templates to get started and personalize with your specific information.
Designing Custom Address Labels
You can imagine that the possibilities are endless if you decide to jump into designing your custom address labels and every choice is yours to make. This option allows you to really bring in your personality, style, branding or theme into an often overlooked element of packages and envelopes.
You can choose from every and any font and color available online to match your brand or aesthetic. The fun doesn’t have to stop there. With custom address labels, you can also bring in your logo, monogram or unique graphics that make them even more memorable.
The many different options can be overwhelming so here are a few tips for creating visually appealing labels.
Inputting Address Information
Mail merge = automation and efficiency. Instead of editing and printing each of your address labels individually, mail merge uses placeholders so you can import your data and have it automatically populate onto the design.
Don’t worry, it’s super user-friendly to set-up. You can reference our how-to guides for Maestro Label Designer and Word for assistance!
Printing Address Labels
After you have everything all set up, it can be tempting to jump straight into your first project. Before you do, ensure your printer settings are correctly set up. We suggest a few test runs and a second pair of eyes to double check with you!
Labeling Tips and Best Practices
- Proper Label Placement: While the only real "rule" to address label placement is that it’s on the front of the package/envelope, it should be placed in the center. If placed in the top left of an envelope, it could be confusing to the postal service sending it.
- Backup Your Design: Saving assets on your computer isn’t as reliable as you may think. We recommend making backups of your design files and storing all versions on an external drive.
- Store Printed Labels Properly: It’s best to keep your printed labels in a clean, dry place to prevent damaging or smudging. To make your processes as efficient as can be, buy and label plastic bins so they can easily be pulled and used.
Key Takeaways
- Printing your own labels offers many benefits such as time and cost savings, customization and branding, versatility and more.
- Only three supplies are needed: computer, printer and label sheets/rolls.
- There are many different sizes and materials available to fit your specific needs and goals.
- You can use a template or design your own custom address labels.
- Inputting address information is an automated, easy process.
- Printing is simple and can be done in the comfort of your own home or office.
Whether you’re a business owner or bride to be, printing your own labels is the way to go as it is cost-effective, convenient and an easy way to let your creativity shine. Ready to take your address labels to the next level? Jump into creating and printing your own address labels now!
