How To Order Die-Cut Stickers [a Step-by-Step Guide]

Custom die-cut stickers are a trend that, at this point, doesn’t seem to be going away. Not only are they used to decorate personal items like water bottles and laptops, but they’re also a great way for businesses to add branding to products, packaging, and promotional materials.
If you're looking to order custom die-cut stickers, it can’t get any easier than ordering with OnlineLabels. Just choose your sticker specs, then upload and adjust your artwork! So whether you design your own stickers for fun, to sell in your online shop, or to promote your business, this article will walk you through how to get them!
Step 1: Choose Your Shape
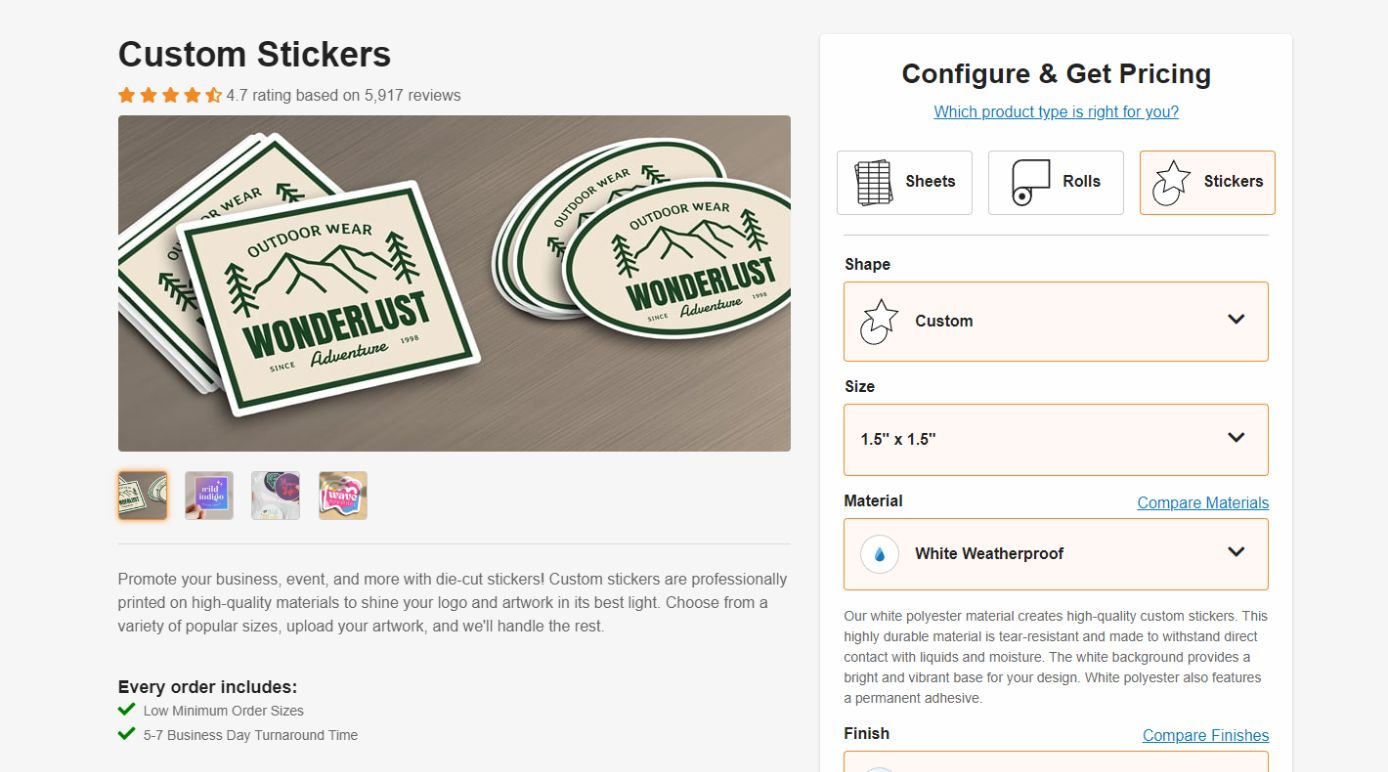
Making sure you have "Stickers" selected and not "Sheets" or "Rolls," the first step is to choose your sticker shape. On the drop-down, you’ll see that you have the choice between four options: custom, rounded rectangle, circle, and oval. Don’t worry about size yet, that’s next.
Step 2: Choose Your Size
Under the "Size" dropdown, scroll to find your desired sticker size, or use the width and height or diameter fields at the top of the dropdown and enter your measurements. The list of sizes below will automatically update with the exact size you enter or the closest one we sell. Once you find your size, select it.
Step 3: Select Your Material and Finish
Our white polyester material is extremely durable, waterproof, and creates high-quality stickers with prints that pop. This material is tear-resistant, engineered to withstand direct contact with liquids and moisture, and features a permanent adhesive — so your stickers won’t move around or peel up once they’re stuck!
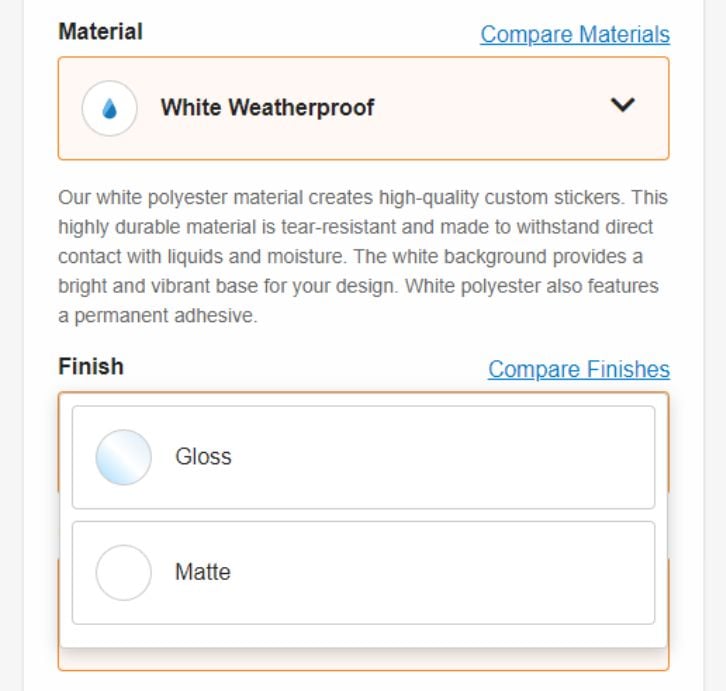
Next up, add the finishing touch to your stickers with... a finish! Here, you get to choose between a glossy or matte topcoat for your stickers. Our glossy topcoat is bright, shiny, and gives a professional, photo-finish look to any sticker.
Our matte finish also adds a level of professionalism to stickers. It’s non-shiny and doesn’t reflect light, meaning your stickers won’t have a glare. Both of our finishes add extra protection to your stickers (they even protect against oils), as they work to seal in the ink.
Step 4: Choose Your Quantity
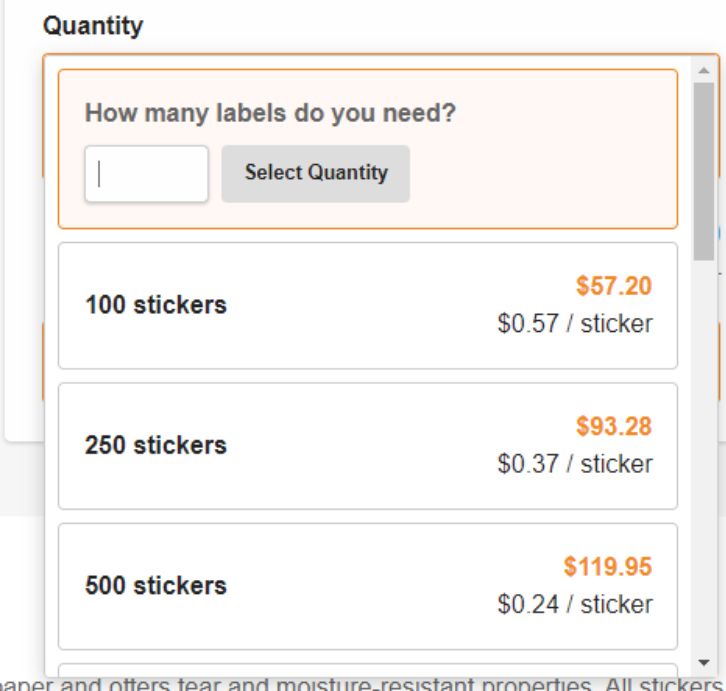
Under the "quantity" dropdown, scroll to search for your desired sticker order quantity. Alternatively, you can type in a number, hit "Select Quantity," and the pricing will adjust automatically.
Note: The order minimum is 100 stickers.
Step 5: Upload Artwork
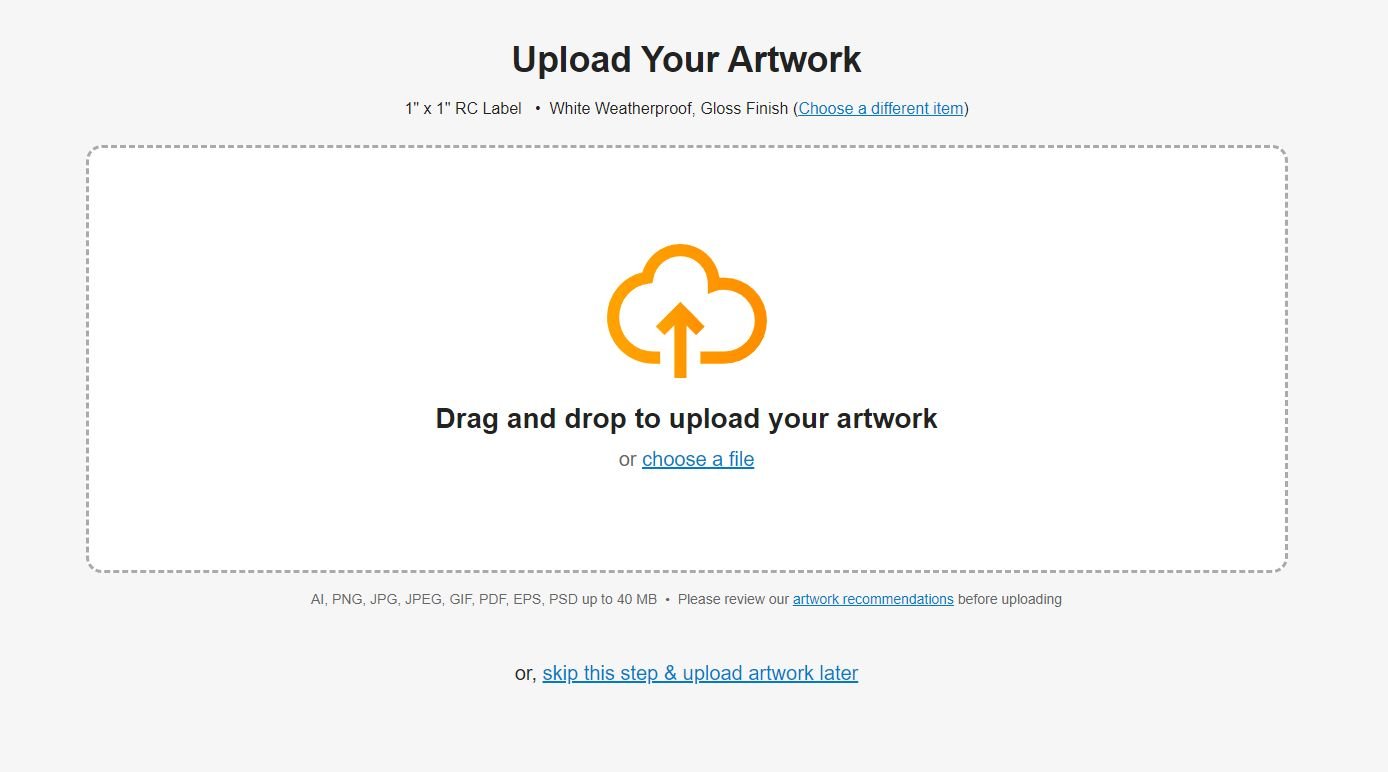
Once you’ve filled out all of the required fields, hit "Upload Artwork." You’ll be taken to a new page where you can choose a file from your computer, or drag and drop. Your artwork must be one of the following formats: AI, PDF, EPS, or SVG.
If your artwork isn’t ready yet, you can skip this step and upload your artwork later (you’ll be able to upload through your order confirmation email). Don’t forget to look over our artwork recommendations before designing your artwork! You can find these as well as a helpful video linked under the artwork upload field.
Step 6: Review and Add to Cart
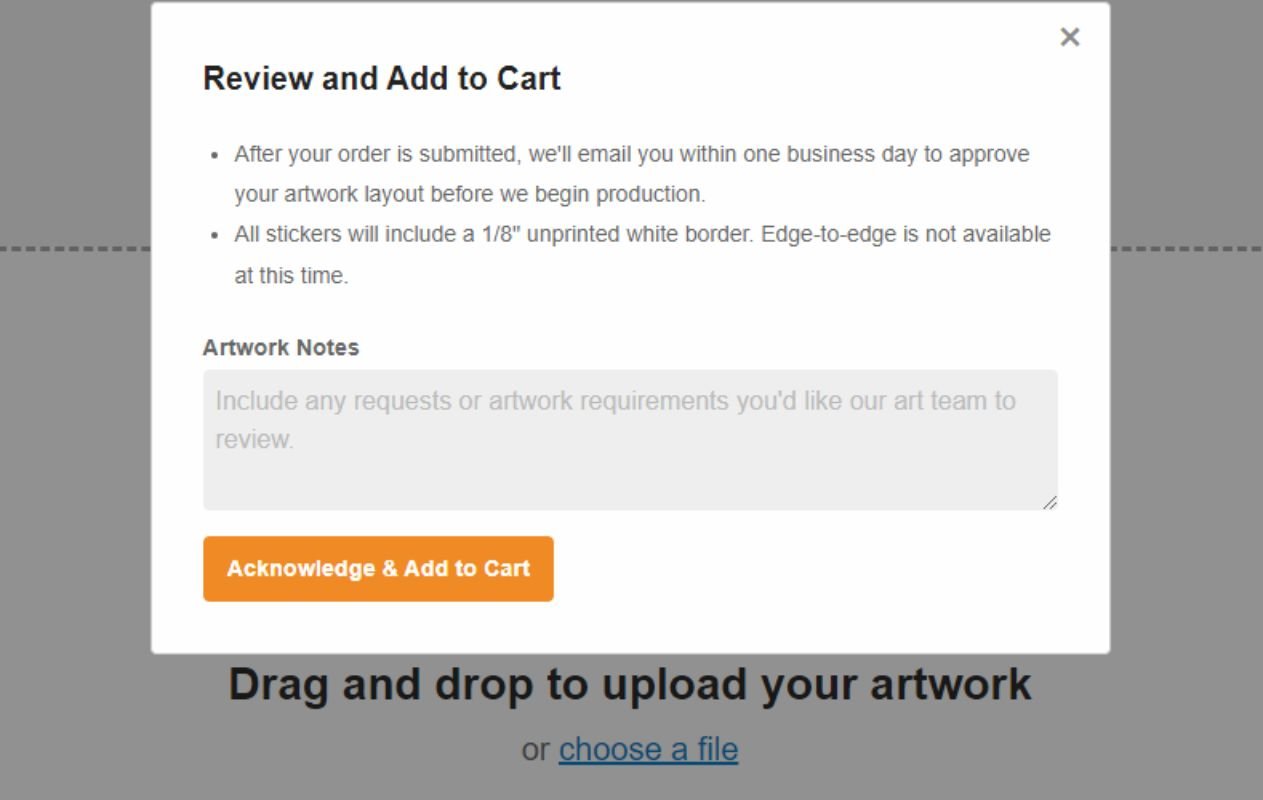
Once you've uploaded your artwork, you've done your part! Our team will review your artwork and trace the die-lines around the artwork with a 1/8" white border. You'll receive an email within one business day to approve the layout. Once we get the approval or make necessary changes, it gets sent to production.
During this step, you'll also have the oppertunity to comment any artwork requests or requirements for our art team to review.
Step 7: Checkout
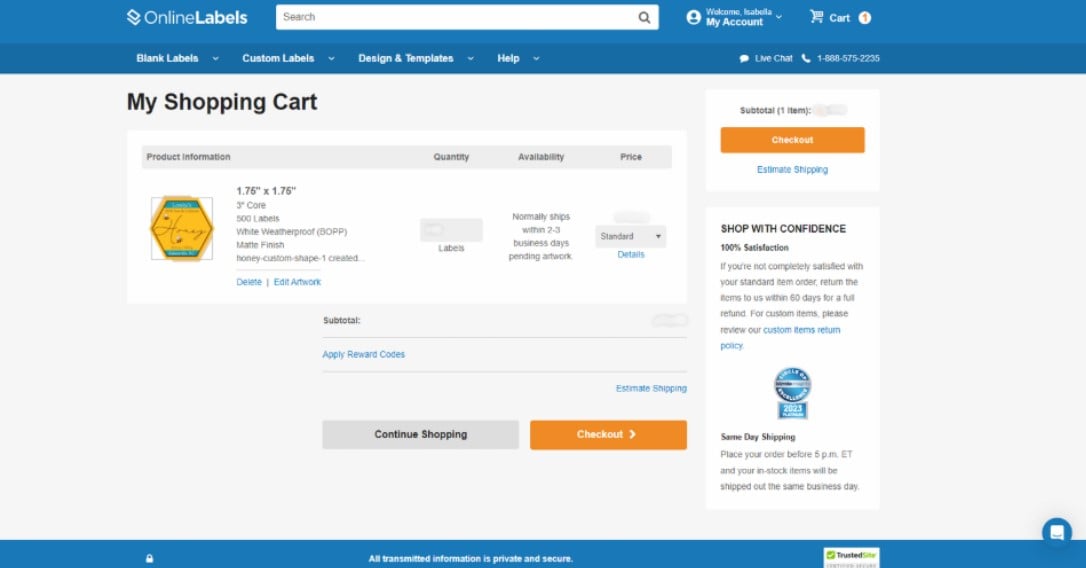
After you hit "Acknowledge and Add to Cart," you'll be taken to the next page where you begin the checkout process. From here, you’ll follow the steps to enter all the necessary contact, shipping, and payment info.
Once you submit your order, our team will get to work and your stickers will be shipped within 5-7 business days.
Ordering custom die-cut stickers from OnlineLabels is a simple and straightforward process. We hope this was helpful as you endeavor to create stickers for your business or for fun!
