DIY Calligraphy Wedding Signs

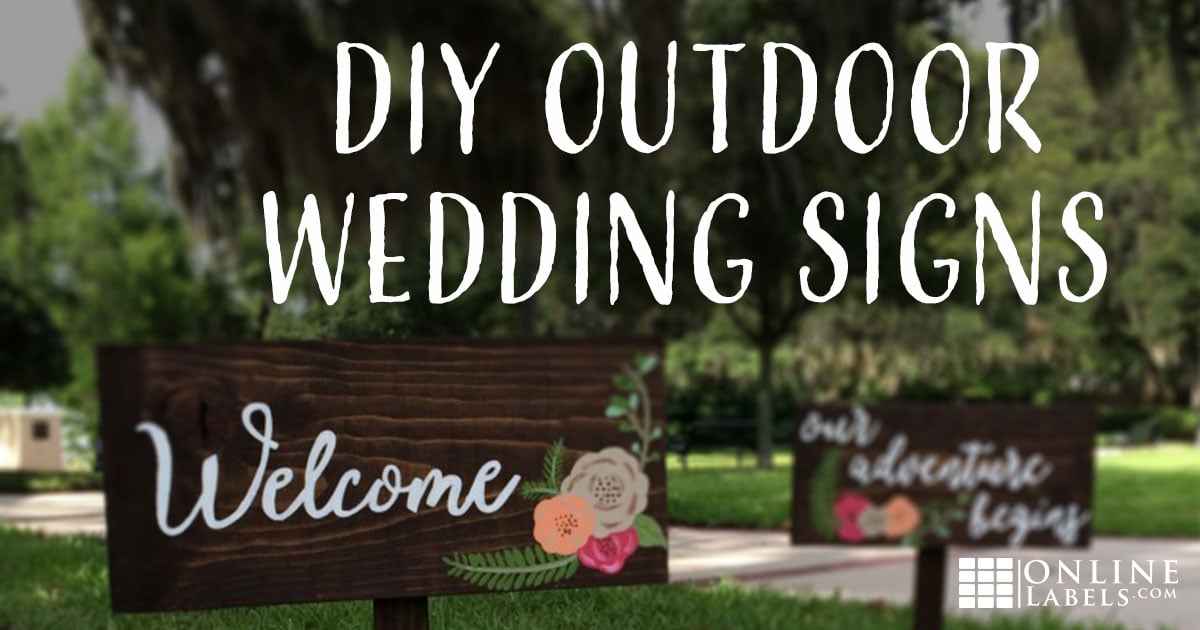
Handwritten calligraphy is an old-fashioned art form that is making a comeback with a modern twist. With the growing costs of American weddings, do-it-yourself brides are becoming more mainstream. It's a chic and inexpensive way to have it all for your big day.
In the following wedding tutorial, we show you how to create elegant and swoon-worthy DIY wedding signs using templates. They feature hand-painted calligraphy (you don't need to have good penmanship to make them) and are sure to add a special touch to add to your wedding decor.
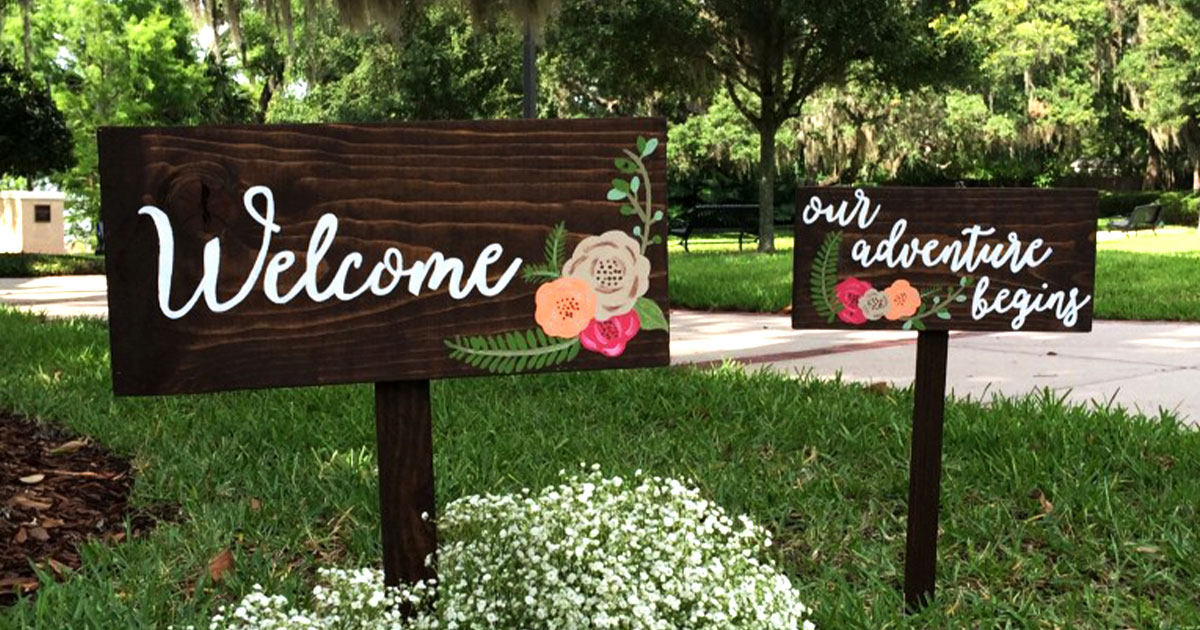
Use your custom calligraphy signs for outdoor events, whether you're at a traditional venue or hosting a nice backyard wedding!
Supplies
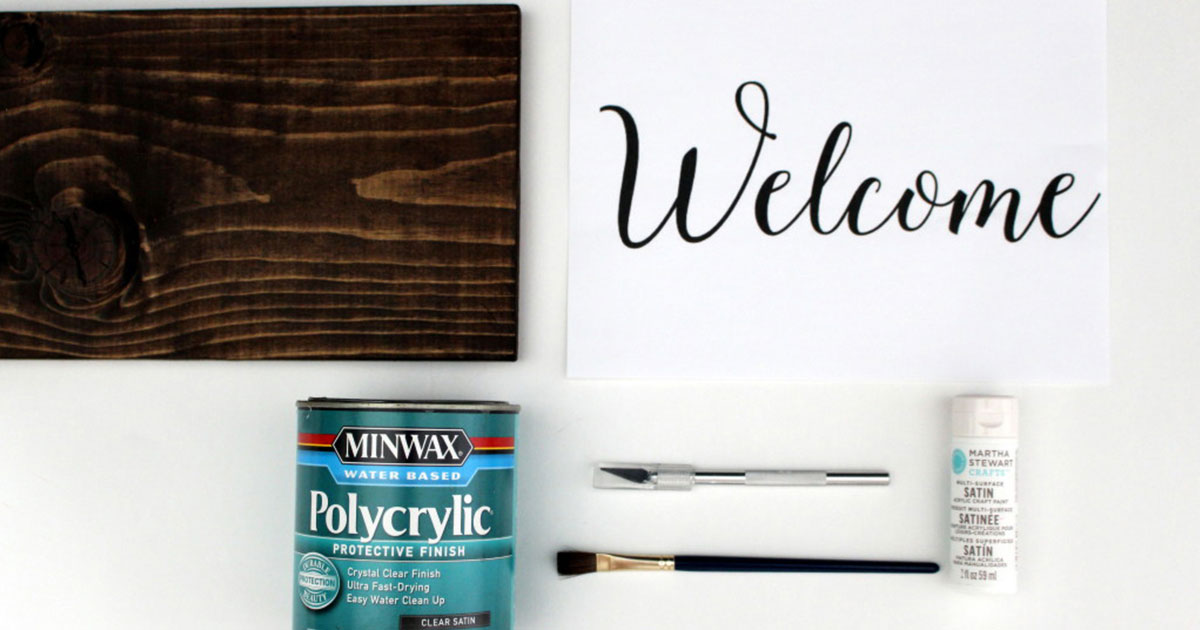
- Stained wooden yard sign
- Acrylic white paint
- X-Acto knife
- Paintbrush
- Full sheet removable labels
- Polycrylic in satin
- Printer
- Free printables
How To
Step 1: Download & Print Templates
Download and print the matching free calligraphy printables on a full sheet of our removable labels.
Step 2: Cut Out Letters
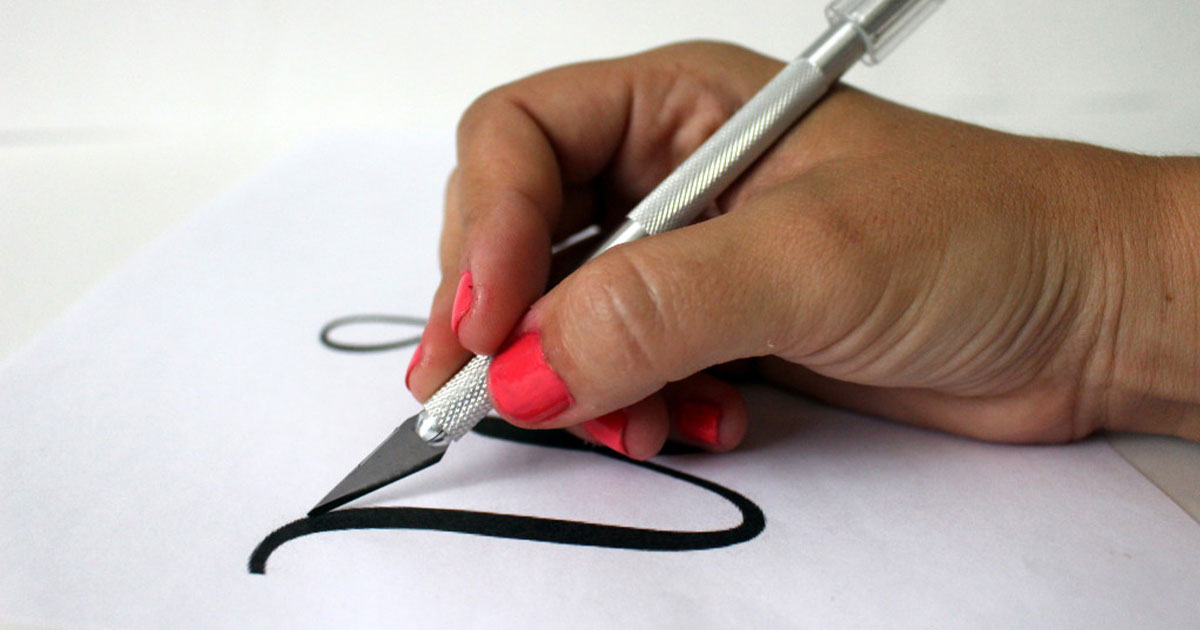
Place your label sheet on top of a cutting board or piece of cardboard to avoid cutting into the surface of your counter or table. Using the X-Acto knife, very carefully trace around all edges of the text.
Take your time with this step in order to get smooth, clean cuts.
Step 3: Peel Up Letters
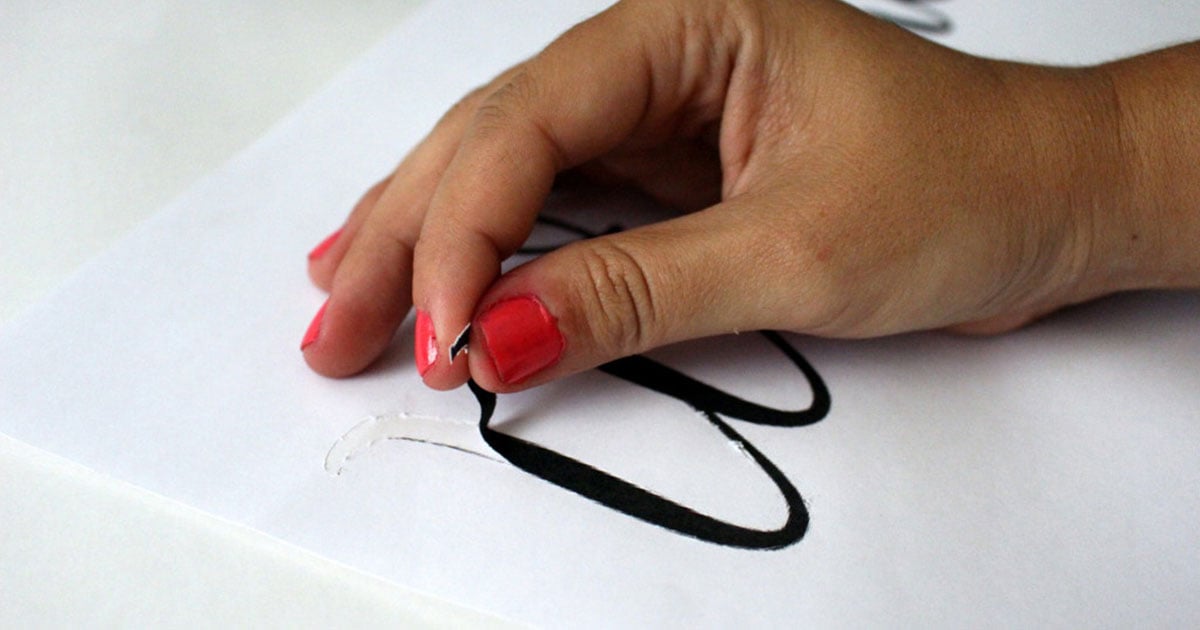
Slowly peel up and remove the letters that you traced with the X-Acto knife. Once all of the letters are peeled off, you'll be left with a calligraphy stencil for your wooden sign.
Step 4: Place on Yard Sign
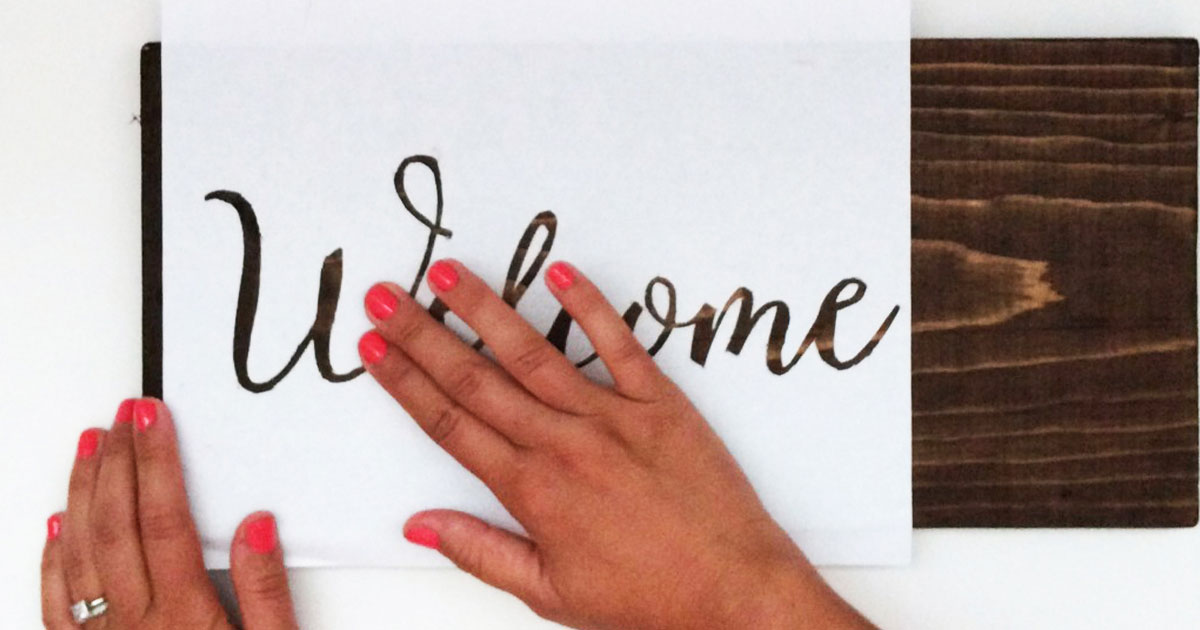
Take the backing off of your newly created stencil and firmly press the label onto your wooden sign. Continue to press the edges of the stencil to avoid lifted edges or air pockets. Paint will leak under the label if it's not pressed down firmly.
You can find wooden signs at local craft stores or create one yourself.
Step 5: Start Painting
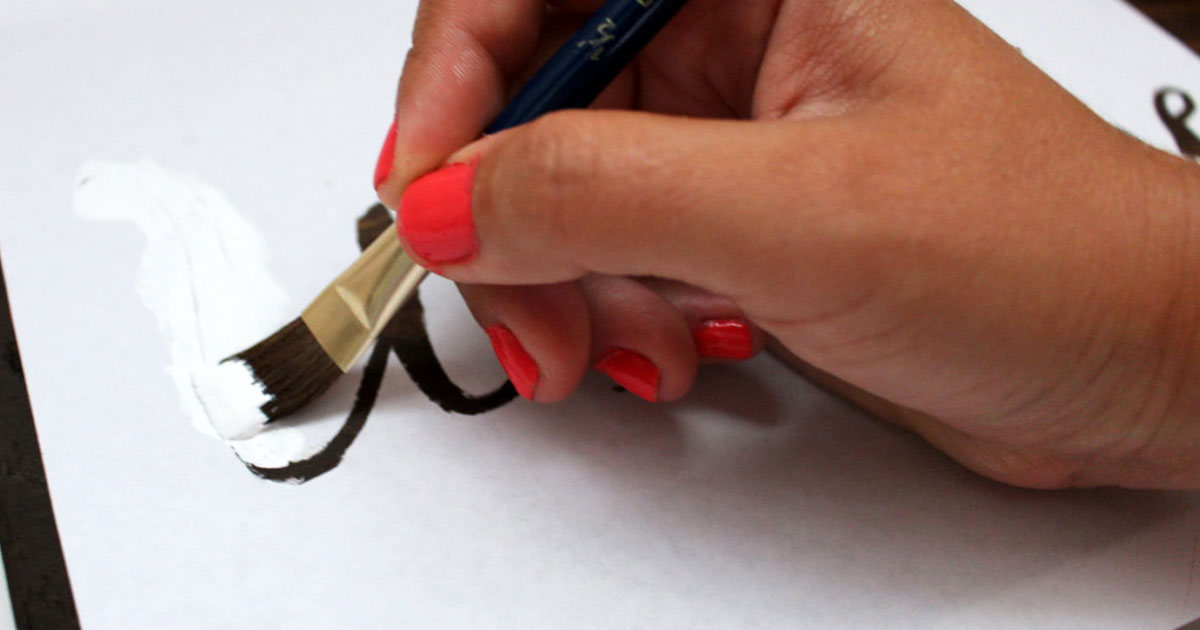
Brush your white paint over the stencil slowly. I used Martha Stewart Craft paint in the color of Wedding Cake. Make sure to paint away from – and not toward – the edges to reduce the paint bleeding through the stencil.
Depending on how much paint you use, you may need two coats.
Step 6

Before the paint dries, slowly pull the label stencil off the wooden sign. This will prevent the paint from sticking to the label as you remove it.
Use a smaller paintbrush to do any touch ups along the painted edges.
Step 7
After at least one hour of drying time, apply the polycrylic in satin to seal and protect the calligraphy design. Make sure to apply the polycrylic in the same direction and go with the grain.
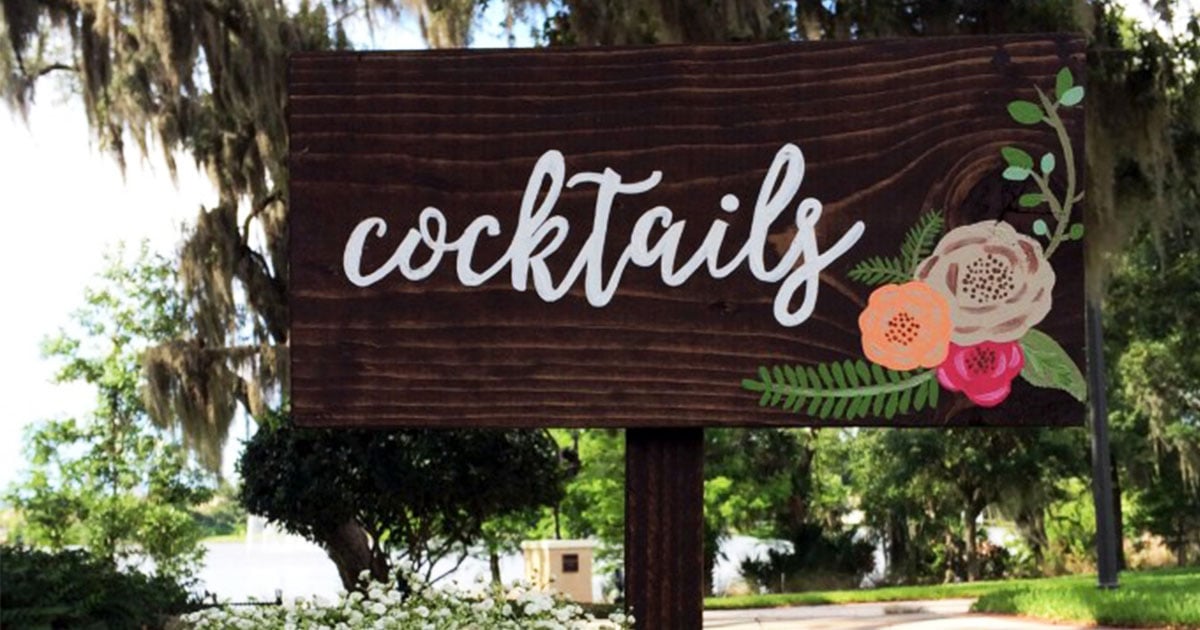
Additional Flair
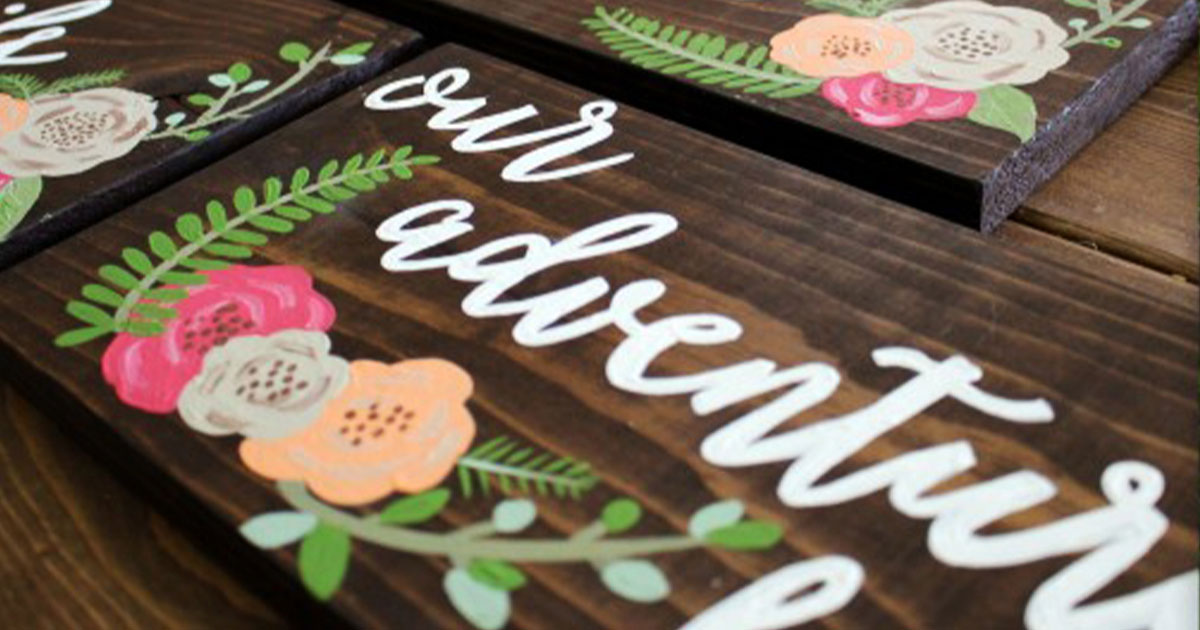
- Use pre-designed templates and free clipart to paint other embellishments (wedding bells, rings, etc).
- Buy additional colors to paint a floral design.
- Attach ribbon to the back of the signs to easily hang them.
- Attach a wooden stake you can find at a home improvement store to the back of each sign to make them versatile within your wedding venue.
FAQs
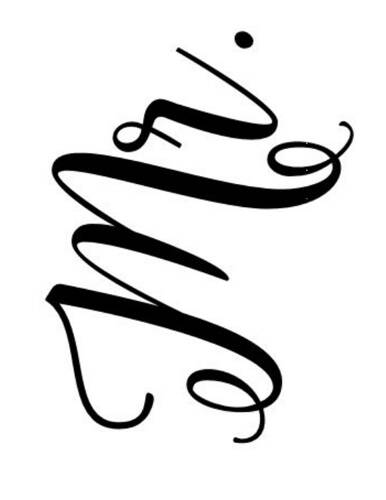
What's the name of the font so that we can create additional messages for our signs?
I used the font Octavia Script for the signs, which you can find here. It's a font you will have to purchase and download if wanting to create other wording.
Another option that won't cost you anything is Brush Script. You can also download fonts for free here. They offer an abundance of calligraphy fonts.
What stain did you use on the wood to get that color?
It's called Dark Walnut, you can find it at Home Depot.
So acrylic paint works on stained boards? Do you always do the sealing coat on top of your signs?
Acrylic paint for sure works on stained boards. It depends on what you're going to use your boards for and if you're going to use them often. The paint will stay on without sealing it, it will last longer with it though!
What are the best fonts to use for wood signs?
Since your signs are intended to help people a little farther away, you want to go with something on the thick side. The thin calligraphy fonts might be hard to read, which would defeat their purpose!
You may also want to avoid overly scripty fonts. If it's too difficult to discern the letters, they may not be as helpful to your guests.
You can now create beautiful and timeless wedding signs in the calligraphy handwriting you have always dreamed of! These signs can also be created to be used for an engagement party, showers, or any other fun occasion.
Want to create personalized stencils to make more custom wedding signs? Design your own printables using Maestro Label Designer.
Want more DIY wedding tutorials? Learn how to make mini wine bottles, adorable welcome bags, or a custom ring dish.
